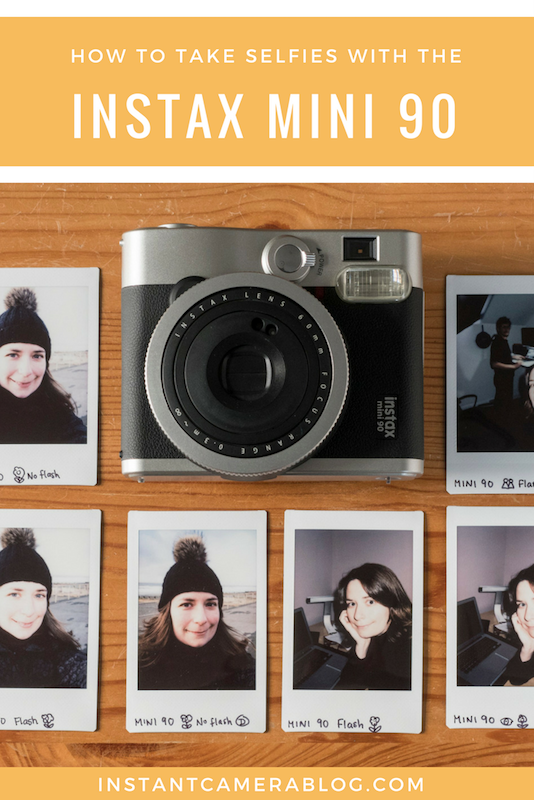
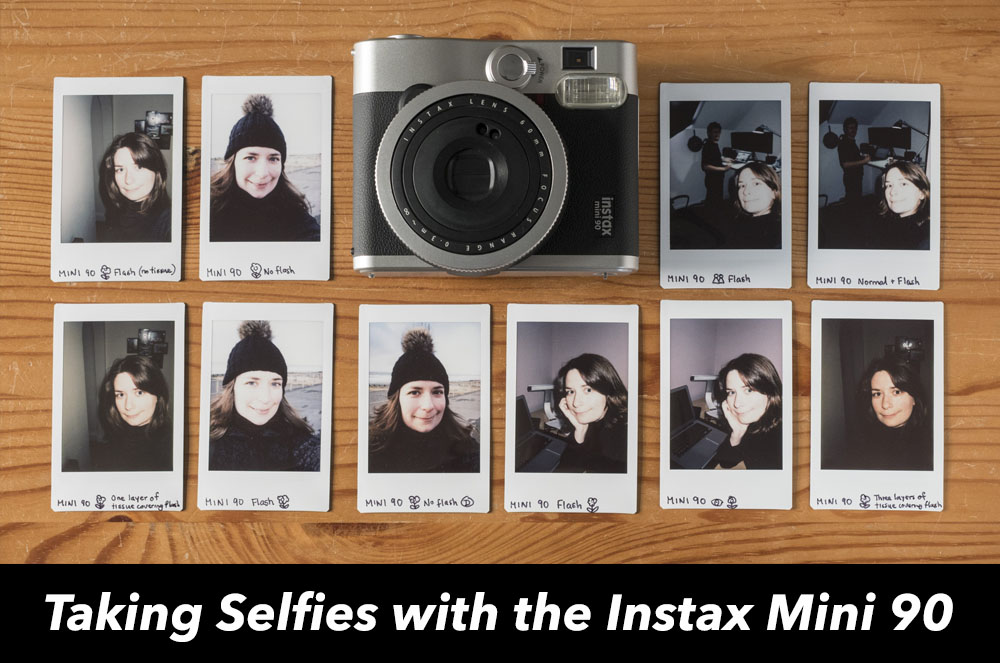
Are you keen on taking some selfies with the Instax Mini 90? Well, you’ve come to the right place!
Unlike many other cameras in the Instax Mini series, the Mini 90 doesn’t come with any selfie features. You won’t find a mirror beside the lens, nor is there the luxury of a dedicated Selfie mode. This is because the Mini 90 targets more advanced users who probably have less interest in taking self portraits than users of the Mini 8, 9 and 70.
So, where do you start if you actually do want to take a selfie with the Mini 90? Let’s find out now!
Ethics statement: We bought the Mini 90 for our personal use. We were not asked to write anything about the camera, nor were we provided with any sort of compensation. Within the article, there are affiliate links. If you buy something after clicking the link, we will receive a small commission. To know more about our ethics, you can visit our full disclosure page. Thank you!
Turn on the Macro mode
The Mini 90 doesn’t have a Selfie mode like the Mini 70 but it does have a very useful Macro mode that reduces the focusing distance of the lens to 30-60cm. (In fact, when you activate this mode, you’ll notice the lens physically adjust!)
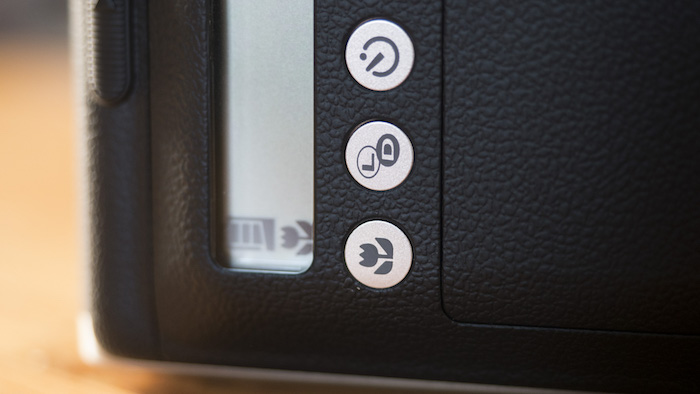
This means that anything within this range will be in sharper focus than the background, which is exactly what you want for a self portrait.
Helpful tip: While the official range is 30-60cm, you’ll get the sharpest results between 40-60cm. If you hold the camera out at arm’s length, you’re pretty much guaranteed a sharp shot.
Use your reflection in the lens
Composing a self portrait isn’t all that difficult with the Mini 90. Simply position the lens so that it is pointing directly at your face and press the shutter button.
However, if you want to be extra sure that the composition is right, try looking for your reflection in the front element of the lens. In the right light, the glossy surface of the lens can work perfectly as a pseudo-mirror!
Note: The accessory company Caiul sells a selfie lens attachment (Amazon) for the Mini 90 with a mirror on one side. I haven’t tried it myself but I’d be hesitant to recommend it because the camera’s macro setting does the same job as a selfie lens.
Get the right brightness: Indoors
Picking the right brightness setting is probably the hardest thing about taking selfies with the Mini 90, in part because the flash can completely wash out your facial features if you aren’t careful.
When you are indoors, you have no choice but to use the flash because if you don’t, the image will be underexposed (too dark).
You can choose between either the normal flash or the red-eye reduction flash, both of which produce very similar results in my experience.
In the two shots below, for example, the only relevant difference I can see is that the irises of my eyes are a little brighter in the red-eye reduction version (second shot).
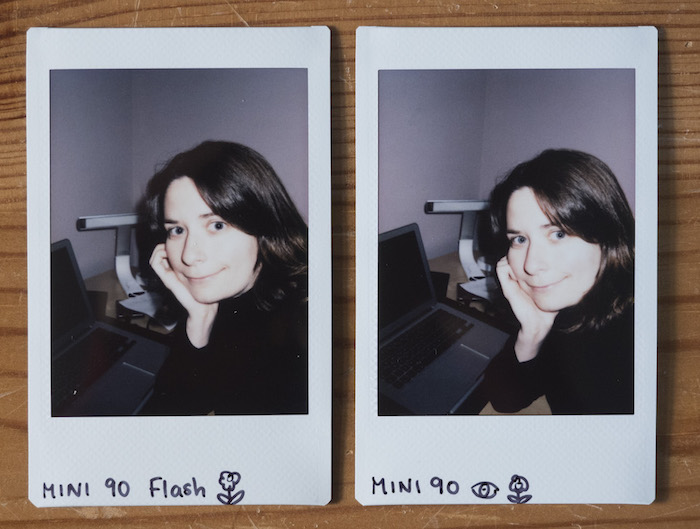
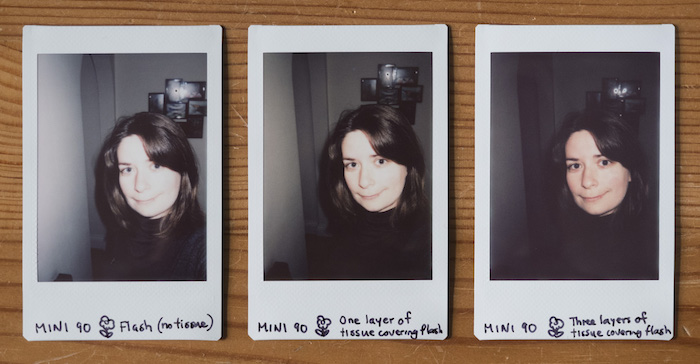
If the skin tones turn out too bright with the flash, you can always try using the Darken mode to decrease the exposure a little. Alternatively, you could cover the flash with a piece of translucent tape or tissue to diffuse the light.
The comparison below shows the difference between a selfie taken with the flash alone versus with one or three layers of tissue covering the flash.
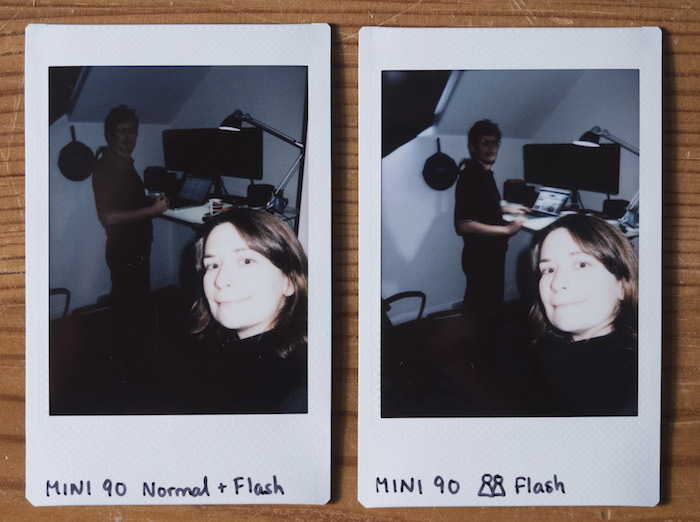
In addition to the flash, there is also the Party mode which, when activated, brightens the background in low light situations. It is useful when you want to give some context to your selfie rather than fill the frame with your face.
You can see the difference between the normal and Party modes by comparing the two examples below. While my face looks the same, the background in the second shot is definitely brighter.
Get the right brightness: Outdoors
When it comes to taking selfies outdoors in good light, you have a little more freedom to experiment. A good example is the series below taken on a cloudy-bright day.
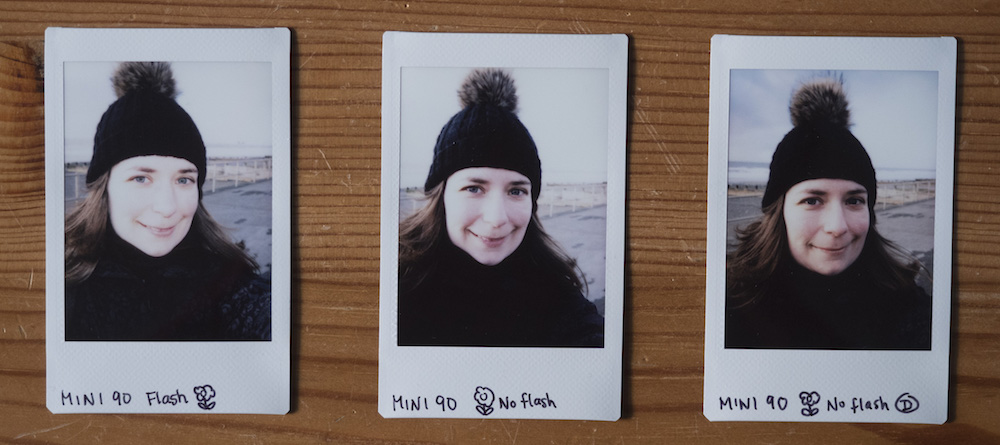
- The first photo was taken with the normal flash. Not only has it brightened my skin tones and eyes, but it has also removed nearly all the shadows from my face.
- The second photo is identical to the first except this time, I turned the flash off. As you can see, my eyes are darker and there are more shadows around my mouth and eyes.
- For the third photo, in addition to turning off the flash, I also activated the Darken setting. Doing so further intensified the shadows on my face and brought out more detail in the background (the sky in particular).
I probably could have tried the Lighten and Lighten+ modes as well, which would have given me a similar result to the first photo with an even brighter background, but I felt the first photo was bright enough.
Of the three, the third is my personal favourite because the background is well-exposed but you may prefer the lighter skin tones. In the end, it all comes down to personal preference!
Conclusion
As we’ve discovered, you can easily take a selfie with the Mini 90 despite not having a dedicated mode or selfie mirror to work with. Simply keep the aforementioned tips in mind and you’ll be taking great self portraits in no time – and remember, don’t be afraid to experiment!
Enjoyed this article? Why not share it on Pinterest!
