
If you’re accustomed to taking photos with smartphones or digital cameras, you know that what you see on the screen is generally what you get.
The opposite is the case with Instax film prints. Though you can hazard a guess as to what the right exposure might be by choosing the recommended setting on the dial, you never really know how your image is going to look until it has developed. Choose the wrong setting and the result will be either way too bright (overexposed) or far too dark (underexposed).
Underexposure with the Mini 9 (or with any camera for that matter) is caused when the film isn’t exposed to enough light and can happen for a number of reasons as we’ll discover below.
1. THE WRONG SETTING WAS CHOSEN
The number one reason pictures taken with the Mini 9 end up underexposed is because the wrong setting was chosen on the brightness adjustment dial.
95% of the time, your safest bet is to trust the setting the camera recommends, especially if the ambient light is evenly distributed. Bright sunny days will almost always require the Very Sunny setting, just as dark rooms will almost always require Indoors. Accidentally chose Very Sunny inside a dark room and you can bet your bottom dollar that your image will be as black as night.
There are times when the camera doesn’t pick the right exposure however, with a good example being the photo below.
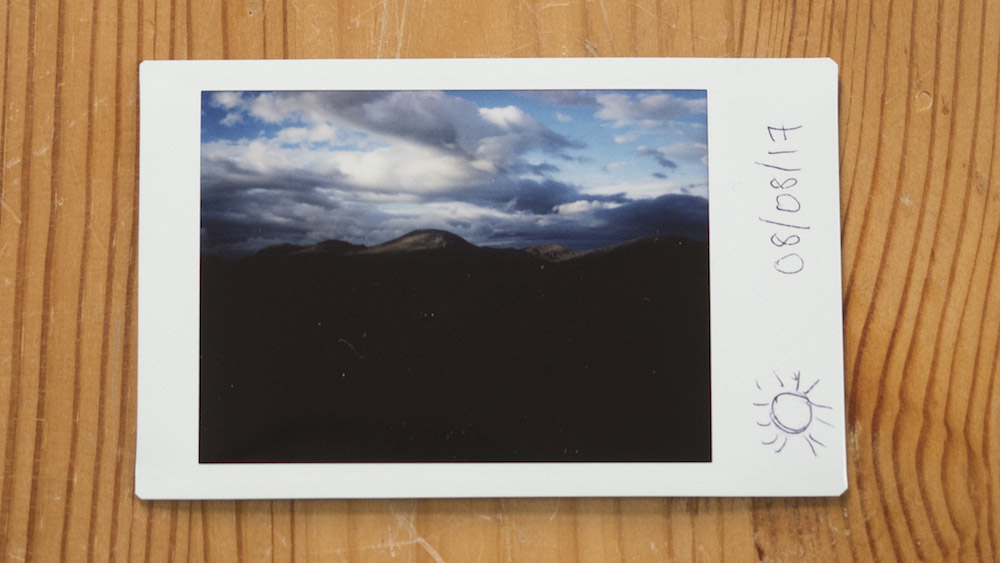
This image was taken close to sunset, when the sky was still very bright but the hills were in shadow. Because the Mini 9 metered for the sky, it naturally recommended the Very Sunny setting, which was fine for the bright areas of the frame but caused the foreground to appear very dark. Had I picked Cloudy or Indoors against the camera’s recommendation, the hills would have turned out brighter.
Note: I’ve found that in general, it is better to avoid very contrasty outdoor scenes like this anyway because the film can’t handle such large differences in brightness. In other words, no matter which setting you choose, part of the frame will be either over or underexposed.
2. NOT ENOUGH LIGHT IN THE SCENE
Sometimes not even the darkest setting (Indoors = 1/60 of a second and f/12.7) is enough to avoid a dark exposure.
This is especially true when you take a picture in a poorly lit place without any clear subject in the foreground that the flash can illuminate. (The flash has a range of 60cm to 2.7 meters, so anything beyond that won’t be within reach of the light the flash emits.)
A good example is this river gorge I tried to photograph with the Mini 9 when I first received it. Although there was some ambient light, it wasn’t enough to illuminate the river and the far-off branch I was trying to capture.
-


- The river gorge taken with a smartphone
-
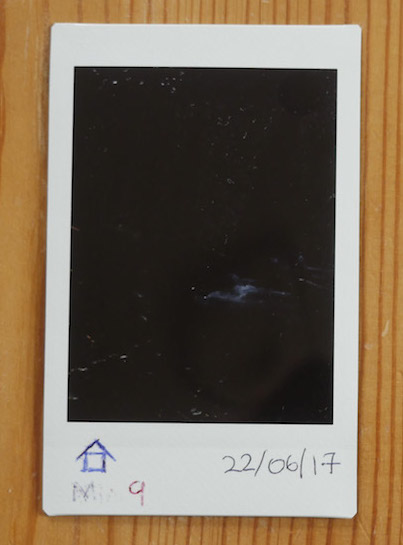

- The same image taken with the Mini 9
In short, never shoot low light landscapes with the Mini 9 and always include a clear subject in your picture if you do decide to use the camera in poor light conditions.
Note: With the Instax Mini 70 and 90, you can use slower shutter speeds than with the Mini 9 whose shutter speed is fixed at 1/60 of a second. For this reason, you can use either model in low light situations as long as they’re mounted on a tripod.
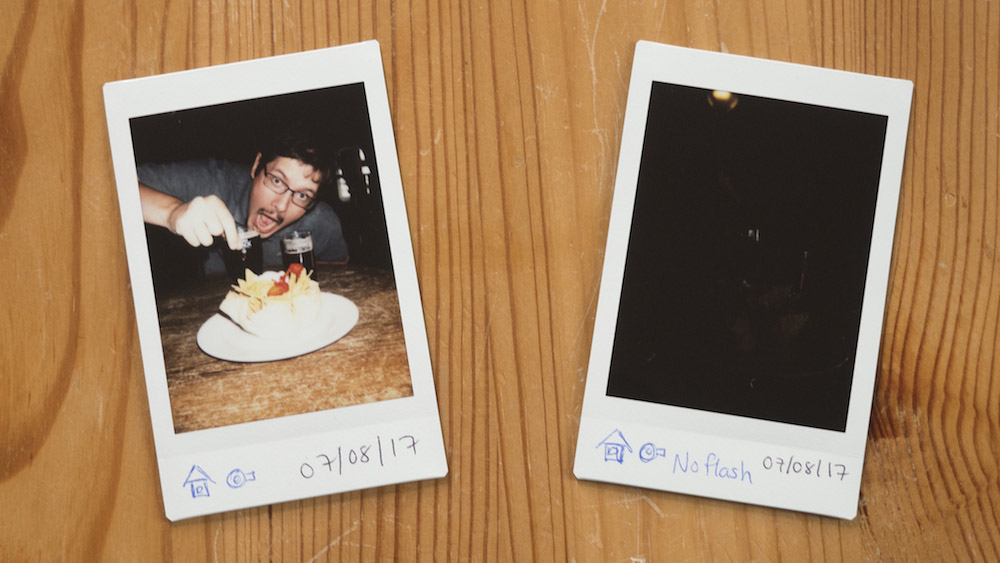
3. FLASH ISN’T WORKING
A less common reason that your pictures might be underexposed is that the flash isn’t working as it should.
The next time you take a picture, make sure that the flash fires. If it doesn’t, it may be time to send the camera off for repair.
Also make sure that you aren’t accidentally covering the flash with your hand when you take a shot as I did for the second image below!
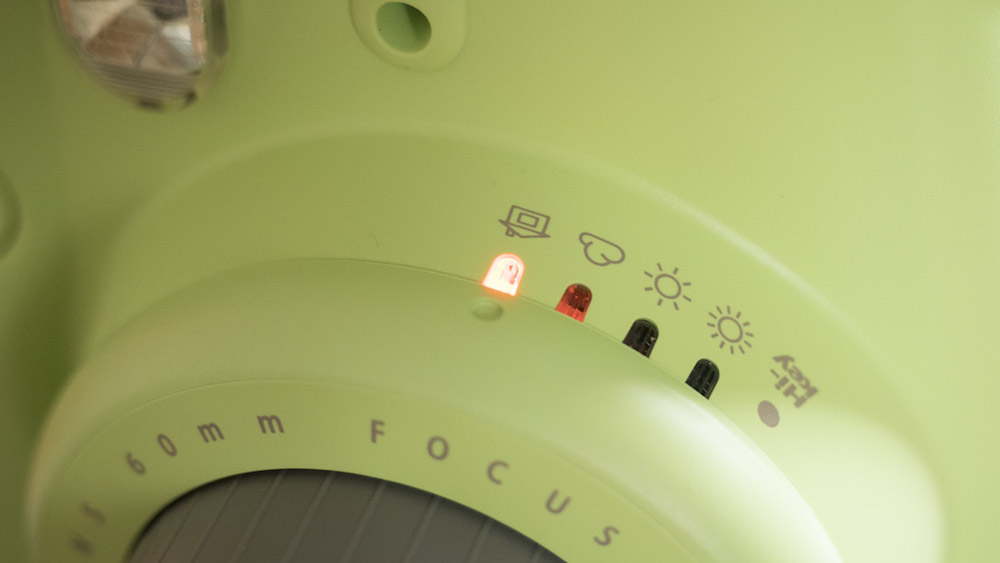
4. EXPOSURE METER IS COVERED
Just as covering the flash can skew your exposure, so can covering the exposure/light meter (the two raised holes above the lens).

Mini 9 light meter
The meter is designed to read the intensity of the ambient light and if it is covered, it won’t be able to do its job properly.
Admittedly there’s a higher chance you’ll accidentally cover the exposure meter with your fingers when holding the Mini 9 than with any other Instax Mini camera because it is directly located on the body rather than on the lens.
Still having trouble?
If your photos still turn out black despite following the instructions above, we recommend sending the camera off to Fujifilm’s repair department.
Found this article useful? Please take a moment to pin it!
